


1 / 5
0
Views
0
Downloads


0.0
0
0 Likes
Anatomy Craft: Build Your Own Paper Skeleton
0 Views
0 Downloads
Paste this activity's link or code into your existing LMS (Google Classroom, Canvas, Teams, Schoology, Moodle, etc.).
Students can open and work on the activity right away, with no student login required.
You'll still be able to track student progress and results from your teacher account.
Information
Description
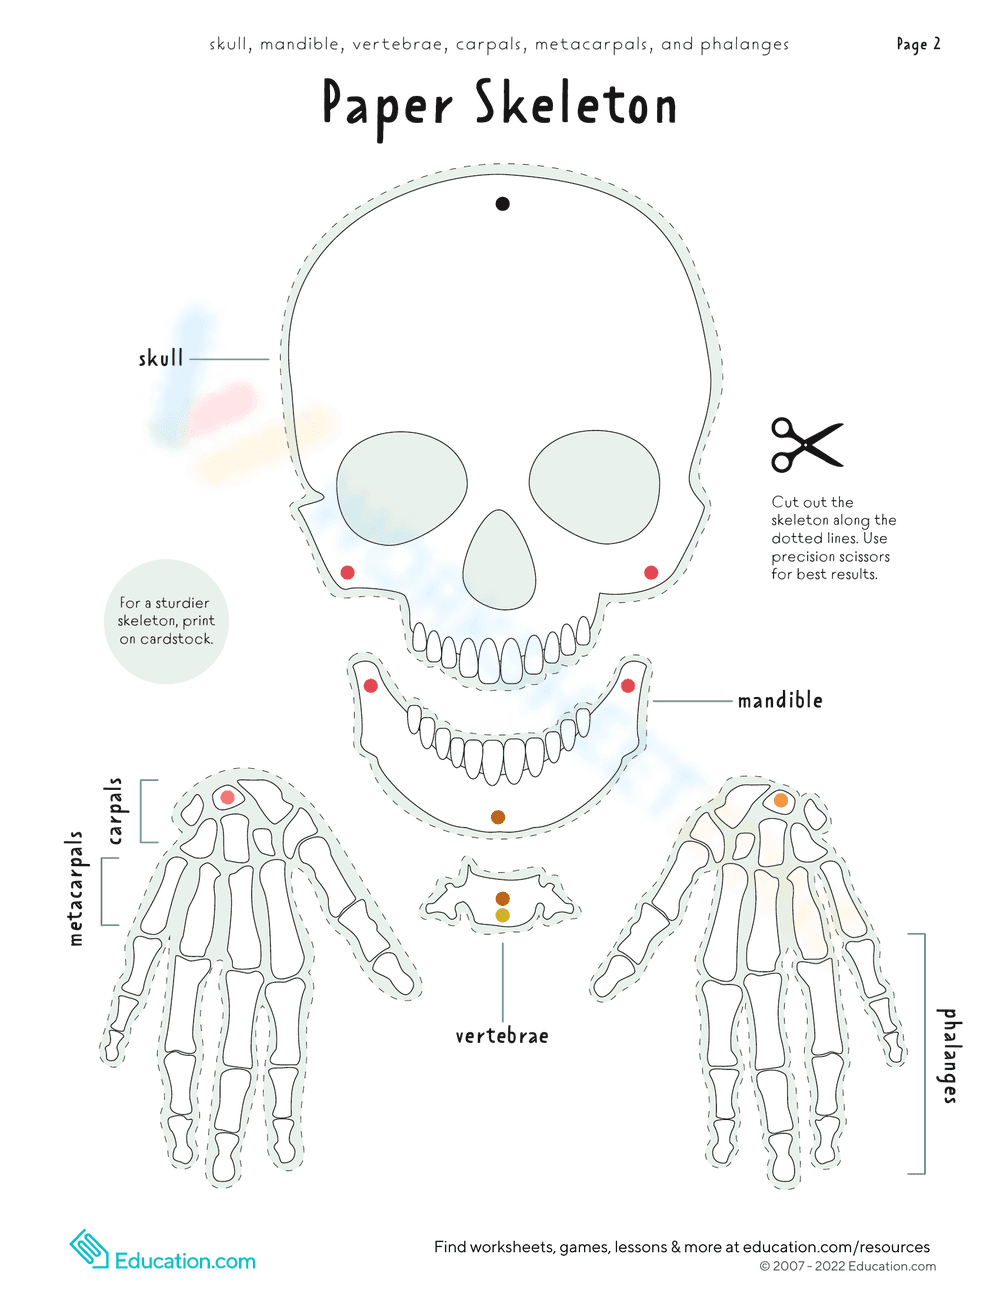
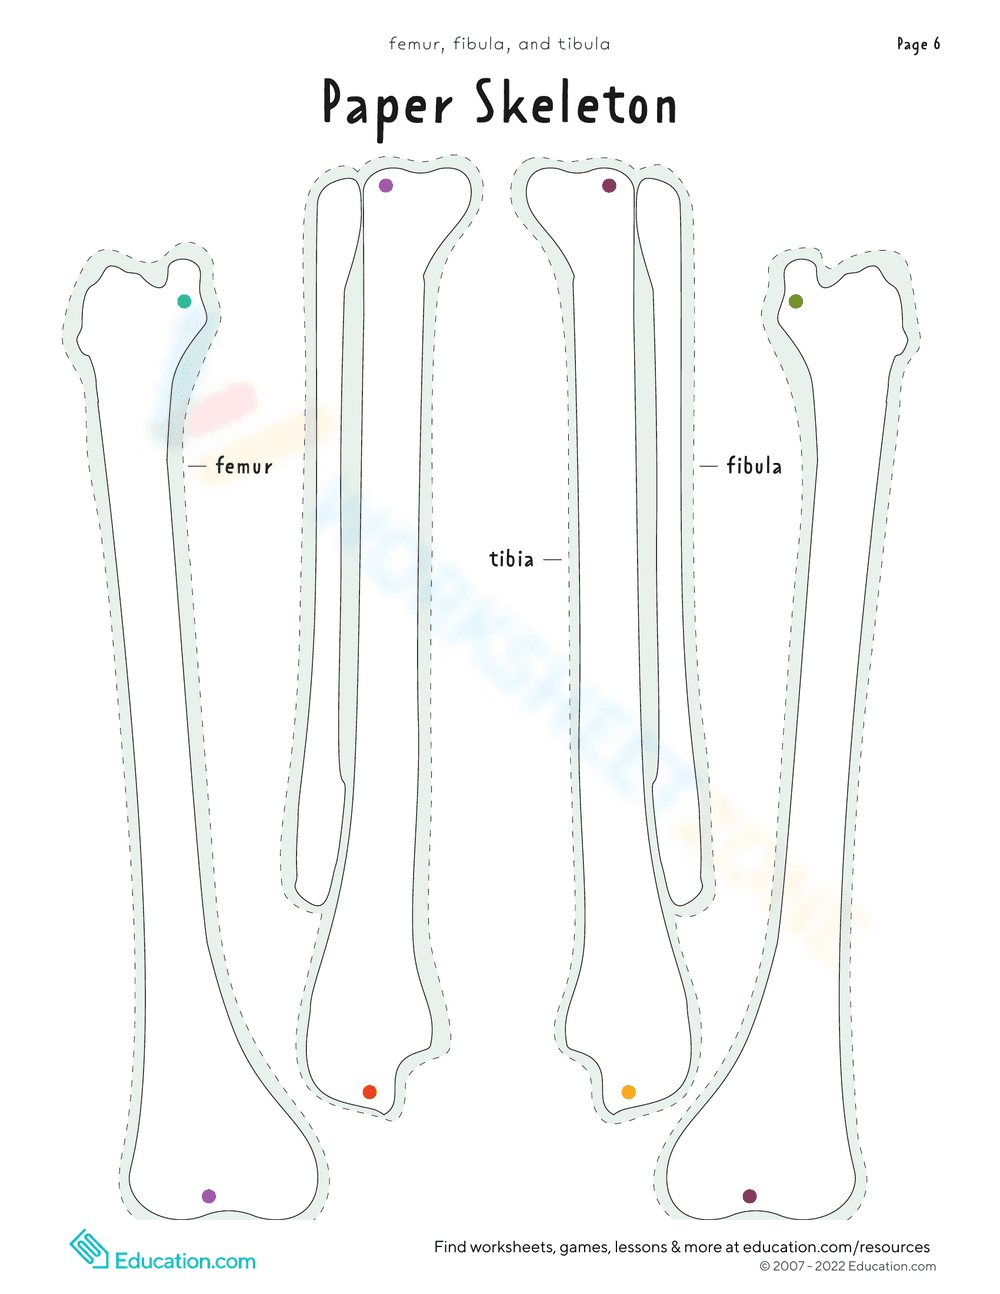
What It Is:
This is a diagram worksheet for creating a paper skeleton model. It provides a visual guide showing how to assemble the skeleton pieces using color-coded dots and fasteners like brads or string. The diagram labels key bones, including the skull, mandible, vertebrae, rib cage, humerus, ulna, radius, pelvis, femur, fibula, tibia, carpals, metacarpals, tarsals, metatarsals, and phalanges. The model includes 17 pieces total and the completed model measures slightly over 4 feet tall.
Grade Level Suitability:
This worksheet is suitable for grades 3-6. The assembly requires fine motor skills and the labeling of bones introduces anatomical vocabulary, making it appropriate for elementary and middle school students.
Why Use It:
This worksheet helps students learn about the human skeletal system in an engaging and hands-on way. It reinforces anatomical knowledge, develops fine motor skills through cutting and assembling, and promotes spatial reasoning.
How to Use It:
Use this worksheet as a guide to assemble the paper skeleton model. Cut out the pieces from pages 2-6 (not shown). Match the color-coded dots and connect the corresponding parts using string, brads, or other fasteners. Refer to the diagram for correct placement of each bone.
Target Users:
This worksheet is ideal for elementary and middle school students learning about the human body, science teachers looking for hands-on activities, and homeschool parents teaching anatomy.